Thursday, May 19, 2011

177.

That, my friends, is the [approximate] square footage of my new apartment. 

One Hundred.
                               Seventy.
                                                  Seven.

Now, I can't tell you the exact location of my new place, since you know, this blog is public & I'm not interested in inviting strangers/creepers/weirdies/crazies to check it out in person, but I'll tell you that it's in the downtown area. It's a lovely place. 

I have been living there since Tuesday, but actually haven't spent much time there at all, between work and cleaning the old house, and so things may change as I figure out more what does and doesn't work, and when I get things or get rid of things, etc. etc. etc. But, I promised my mom she could see better pictures than my phone can send, so this is it.
First, I'll start with the porch.
it's huge. I haven't measured it, but it's probably about the size of the apartment.


It doesn't really have a plan, yet, since it's quite light on furniture, but it will shape up :)
I painted that little corner table, by the way!

So, now that you've seen the outside, here is the inside view of the front door. I haven't had time to hang pictures, so just imagine it like it's been hung.


And, in the spirit of bargain-hunting, the bed came from a garage sale at my brother's neighbors in Romeo. It's an antique frame. The bedside table came from a garage sale, and I painted it. The lamp, from Goodwill, the picture is a copy of a print Grandma O & I found at a garage sale. She has the original. The rugs... I think Goodwill, too, my mom's a Goodwill Girl!


This is the South Wall... The Dresser came from a garage sale, I painted it. The bookcase was left behind from a roommate last year, and the shoe hanger thingy was a Goodwill thing, too. 


The closet is actually pretty big, it's about 5'x3', and I don't have any pictures of it yet, but I'll update later with some. I hung the Safarigami painting I did! That chair is the one I covered in the last post, the TV cupboard is a shabby chic thing that came from, you guessed it, Goodwill!

The last little bit: 
The "Office" area. 

The table was from a garage sale, the chairs from a used furniture store. The lamp and picture... goodwill! 

Now... if that much stuff in that tiny space isn't enough to blow your mind, let me throw another number at you.

 169.

That's how much we outfitted my apartment for. 
Bed, nightstand, dresser, bookshelf, 3 chairs, TV cabinet, table, 3 lamps, 2 rugs, a bathroom cabinet, 2 pictures, and a freaking partridge in a pear tree. 
Kidding on that last one.

I don't have any photos of the kitchen, bathroom, or closet yet, because those areas haven't been completely moved into yet. But when I do, you can bet you'll be seeing those photos, too!

(PS. My bathroom? I hate it. It's the only part I don't like. You'll see why.)
....suspense....


Friday, May 13, 2011

It's All About Covering Things...

This is a theme post. More specifically, this is the first theme post. It's about covering something (a hint you may have gotten from the title) and there will be a few more posts in the not-too distant future about covering other things. That's what makes it a theme.

Today it's a chair. Now, I've never "reupholstered" or covered a chair before. I didn't really know how to do it. But when has that ever stopped me?
Never.

 So I just jumped first
                                                            & looked later.

So even though this is a cover story (no pun intended), it also involves a Before & After. So, here's the before: 

It used to be quite cute: I got it last summer at a garage sale in Romeo. I think I paid $5 for it. It lasted me a year, and then the fabric got worn and started tearing. But why throw it out when you can just make things up as you go along? So I took it all apart. That blue on the bottom was covering an ugly blue silky fabric... and that was covering....
this:
Can I get a collective "ick"?

So my plan of action was to remove the old stuff, put on the new stuff... sounds simple, right? . I pulled out a gazillion staples. That awesome (ugly) table-cloth like cover was regrettably nailed on, so I just left it. The back of the top cushion was nailed on, too, so I left that. 
I used the old fabric pieces as stencils to cut out a bottom layer of plain white. 

Luckily, I didn't have to worry about being neat, since it all gets hidden later

So then I used the white liner pieces to cut out the top pieces (which come from some fabric I had left over from making a bed for Hugo [cat] awhile ago), and stapled the crap out of it. I stretch canvas for my paintings, so I used the same theory...staples go about a thumb's width apart. (Also, if you're thinking of doing it, I stapled at opposite sides of the circle, top to bottom, right to left, top-right to bottom-left, etc. etc.)
It seemed to work... 
The black marks are to mark where the screws fit.... an important step I'm impressed I remembered the first time.

Covering up the 70's inspired mistake.

And, 
after reattaching the new cushions to the frame... 
here's the after!


And, for a bonus... as we all know how I'm unable to resist lovely details...
Yup. I monogrammed my chair. 

SO. "new" desk chair.... $5 last year.
Oh, yeah.


In addition to more  covering posts, I'm also moving
into a new apartment, TOMORROW!
You'll get to see me try to fit   a house-worth of stuff 
into a bedroom-sized apartment. 
Hilarity ensues. 


Tuesday, March 29, 2011

A Great Weekend Deserves a Great Thank-You Card

First, let's make fun of men.
I was invited to a fancy dinner called Winter Fest because my friend's girlfriend was unable to go. 
I inquired as to what kind of dress I should get because "fancy" can mean so many things.

Me: So what kind of fancy, like prom-dress fancy?
C: Yeeeeaaaah... sorta
Me: like an evening gown?
C: You mean like lingerie? No, put the girls away.
Me: that's not what an evening gown is. Is it Black Tie?
C: No, you can wear any color you want.
Me: You're so not helping.

Second, let me tell you about the dinner.
It was one of the best times I've ever had. I met this awesome older lady, Sabine, and she was hilarious and wonderful. She & her husband are originally from France. I complimented her on her ring, and she says, "That's 3.5 karats of pure diamond right there! You know in France, it is customary for the in-laws to buy the ring." I told her that was a really neat tradition, and she replies with, "Yeah, AND you get a bigger ring that way!!"
A woman after my own heart ♥
The dinner was AMAZING [prime rib!] and drinking happens, and the waitress (who was otherwise excellent) seriously slacks in removing my empties. Seriously. At one point in the night, I had 6 glasses in front of me, and only one was water. And of course, Mrs. M noticed & made fun. I explained my predicament, everyone had just as many drinks as I had, but it was the waitress's fault! They continued to make fun.
(Sabine only drinks wine, and prefers red to white. She has two glasses of red wine every day, one with lunch and one with dinner.)

We were also treated to a glorious sunset:


Third, let me [finally] tell you about the card.
So, again, if you're my Facebook friend, you've probably already seen the cheeseburger card I sent the M family after treating me so well during Caseville's Cheeseburger fest. If you haven't, here it is:
So I had big shoes to fill

It took me awhile to think of a card that could be just as good, if not better. I realized I couldn't make one funnier. So here's what I did:

These are the 6 things the 4 of us drank in an accordion-fold card.


Last, I'll compare my roommate, Fancy, to a toddler.

Me: Look at this Thank-you I made for the M family
Fancy: I WANT ONE!!!!

So, by request:


Thanks for reading :)


I'm Not Gonna Lie... These are Pretty Neat!

If you are my Facebook friend, [which, if you're one of my four followers, you are] then you'll recognize the first series of things I'm posting. But you haven't seen the second, so keep reading!

It all started with a doodle. I doodled an octopus, and then I gave him these big eyes on the side of his head. They looked funny, so I gave him regular eyes. Then I had to disguise the mistake... with headphones! So then I had a clever little octopus grooving to some jams. I doodled him on a few other things... class notes, worksheets, whatever, and finally I had to make him official:


And the rest followed:

I actually have these sunglasses.... wish I had the tiger!


This one is my favorite :)

Kangaroos lick their forearms to wick away heat in the Australian sun. Or, they just enjoy an ice cream cone.
I almost did a Hippo in a Tutu, but that was a little too Fantasia for me.

Skiing Moose... but surfing would have been funnier.
Upon seeing this, my Dad says, "What's this obsession you have with guns??"
I think he's worried about me...


Think he's going to make it with that?
"You see things and you say 'Why?' I dream of things that never were and say, 'Why Not?'"

Sly & Classy
This one was done for a "thanks for the invite" to a Chicken dinner....
Where different kinds of chicken were served....
And ONLY chicken was served.


Secondly:
this is a "series" of ads/notices/info signs I did for some people over at The Central Review. They thought of the sign... I did the pictures. 
The editor said, "I want them to be so cool they get stolen."


So that's that. A bunch of silly things I've been up to lately. Hope you liked it :)


Monday, March 28, 2011

I Can't Borrow a Headband for Forever...

I borrowed my roommate's headband.
                                          I fell in love with it.
                                                            I wanted it.
                                                                            I needed it. 
                                                                                        But she wanted it back.

SO I MADE MY OWN!


Step 1: Find a cool fabric.
I used an old plaid button up that has been in the "mend" pile for quite some time... I had a photo, but I accidentally deleted it. My bad.
Step 2: Cut into 6 strips, about half an inch wide, and at least 12" long, and two additional pieces about 1" x 3".

Step 3: Braid. Make two braids, obviously... since there are 6 strips.
    If you don't know how to braid, ask a middle school girl. I'm sure she'd be able to teach you.
       Helpful hint: I safety pinned the 3 strips together, and then taped the safety pin to my desk so it couldn't go anywhere.

Step 4: Cut two hair elastics on the seam.

Step 5: Hot glue one end of a hair elastic to each braid, securing all three strips.

Don't Forget: Hot glue is [not surprisingly] HOT. And it is capable of burning your fingers through the fabric. Use caution. And a long stick, if necessary.
Step 6: MEASURE. [After the hot glue has cooled] make sure it will fit comfortably around your head. Depending on the length of your strips and the size of your head, you may need to trim the hair elastic, but remember, they need to stretch a little bit!

Step 7: Hot glue the other end to the other end of the same braid, it'll almost be like having two headbands. You can stop here, actually, and really just wear them as one or two, but I prefer to continue to the next step, it makes a much more secure headband.

Step 8: Wrap the extra small piece of fabric around both braids where the braid meets the elastic. Repeat on the other side.


And it's finished!!

And, now to model it in its awesomeness:
Oooooh yeah!


So not only is this a no-sew headband, it's also a no-cost headband. It's a very good rainy day project... don't be afraid to experiment with different fabrics... maybe even a bow or flower!!

Sunday, February 27, 2011

This Pattern Deserves Better.

I made something out of something. Like I do.

I wasn't happy with it. Which sometimes happens. 

So I gave it away. Because it's still cute. 

But I have big plans for this pattern. So you're gonna see it again. 

But first: The before. Just a regular, plain t-shirt that I've had for ages.

I cut up the middle, and then I cut off the neck.


Then I turned it inside out and pinned the new hem about an inch wide.
Remember when pinning that the back needs to be turned to the inside of the shirt,
which is now the outside. 

So after I stitched the new hem, I inch-wormed a thin, organdy ribbon through the new "tube hem" (I just made that term up) with a safety pin. I thought I took a photo at this point, but I guess not. 
I didn't like it simply because it didn't fit me. The T-shirt is too small and my... well... you know. It wasn't flattering, to say the least.

So here's the completed project, modeled by (and given to) my lovely roommate turned assistant, Fancy.
She looks so happy when I give her presents.


What I'm envisioning for this pattern is a cable knit sweater, super soft, with a coordinating silk ribbon. So that's gonna happen... as soon as I thrift the right sweater!

This project: $0. 


Monday, February 21, 2011

I Have an Ugly Apron.

Yes, I wear an apron.
Why an apron? Well, for a couple of reasons. First, I fry things in olive oil a lot, and it spatters, and I'm sick of tiny oil splotches on my clothes. Second, when I make bread or pizza dough, I wipe my flour-y hands all over my jeans. Gross. Third, I have a painting class and to prevent ALL my clothes from being permanently oil-paint-stained, an apron is a must. Fourth, I'm pretty sure I was a 50's housewife in a past life. But the problem...
This apron is ugly.
Can't you see how unhappy I am?
So, the last time I was at Goodwill, I bought this to turn into an apron.


I also love these socks.
Things I love about the smock: 
These Buttons ♥
-The Girl Scout-esque color palette
-The large pockets
-The buttons

Things I hate about the smock:
-It's a tent
-The extremely high front
-The back is exactly the same as the front, minus the pockets.
-It's not an apron.


This is how I fixed it:

First, I cut straight up the back. I wished I had my seam rippers, but they are currently in hiding. 
There are those socks again!
I also removed some fabric to battle the tentness. 14 inches of it, actually...


I put these aside, as they will come in handy later.


This is after both of the sides have been hemmed. I chose a fushia-colored thread because I liked the way it looked, and I didn't have a brown that matched.


Remember that extra fabric I cut out? Well, here it is again!
I folded the extra strips in half inside out and pinned and stitched it to make the ties... a very important part of any apron! The top one is completed, the bottom one is just pinned.


I attached the new ties to the back of the apron with a couple of cute x's.
just because.
So that leaves just the one problem left: The awkwardly high neck. It was an easy fix: I made a cut straight down the middle and folded the extra fabric back:
Then I hemmed it and trimmed off the access fabric underneath.
Annnnnnnnndddddd
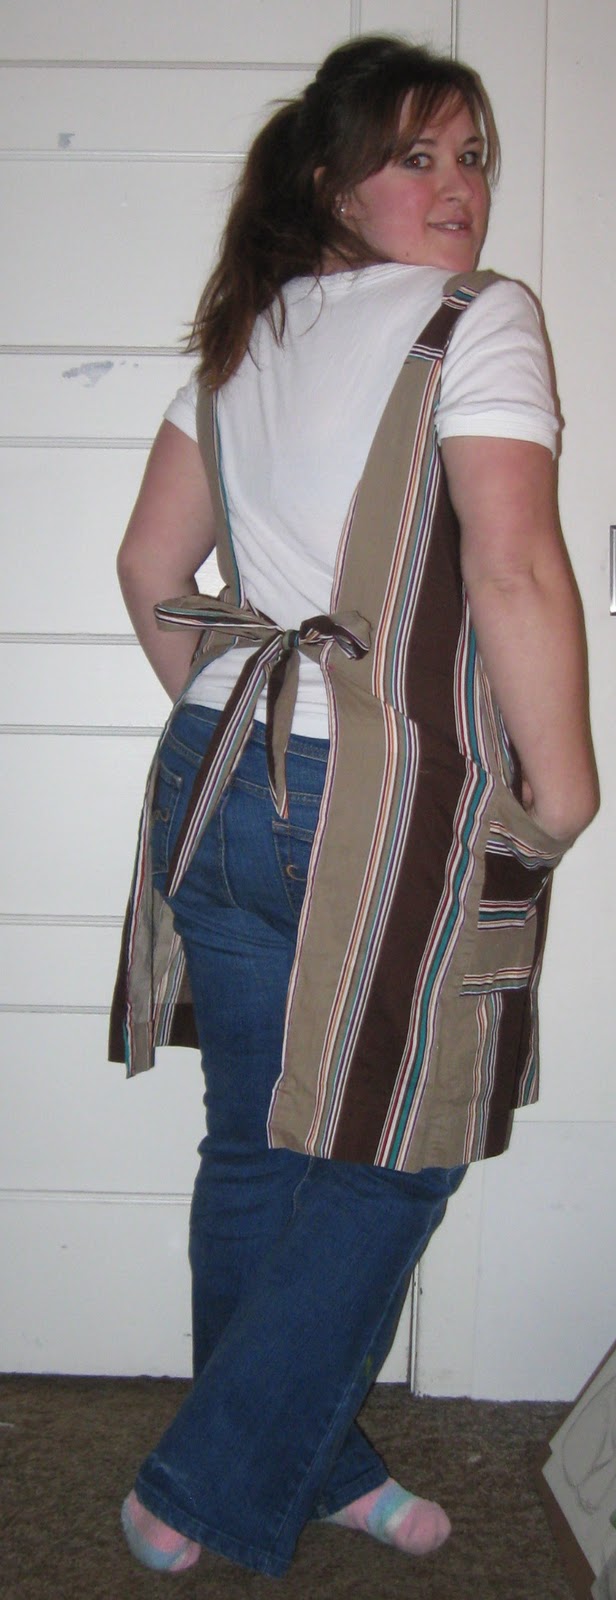
Here's my new Apron!!


This project: $3.50